How to Hike Havasu Falls: Permits, Costs, Camping + Tips for Havasupai


Our experience hiking Havasu Falls…
This year (2026), we were lucky enough to snag permits for the famous Havasu Falls hike for March 23-26. We were very excited, but also felt like it was hard to find information or answers to our questions leading up to the trip!
We had the most incredible time and would easily name this our favorite backpacking trip we’ve taken so far!
Hiking down to Havasupai feels like you are entering a different country, a different world. It feels truly like a desert oasis, or even the Amazon. The colors will leave you in awe, the hikes will be fun and engaging, and honestly, we found camp to be romantic.
We hope you enjoy the resource we have put together here! Answering all the questions we had going into it, sharing some inside tips from our experience!

How to get permits to hike to Havasu Falls?
You can only hike and camp at Havasupai with permits obtained through the Havasupai Tribe’s website.
You can create an account on the website here: https://havasupaireservations.com/
When February 1st rolls around, you want to be *quick* to sign in and try to get your tickets. Obtaining camping permits is hard. The website often crashes because of the number of people on the site.
In the year we got our permits, it took 3 days to get through the site to check out. So keep trying if you are having a hard time getting through! Your permit can be for up to 12 people.
Havasu Falls Cost
You will have the option to book a campground site or stay at the lodge. Reservations are 3 nights/4 days. The cost to camp this year for us (2 people) was $990, which is $455 per person. The lodge for 3 nights this year was $2,277.

Checking in for your Havasupai Hike
You will need to check in before you can start your hike.
You will check in at Grand Canyon Caverns Inn. You can check in from 6 am to 5 pm, however, depending on the time of year, sometimes they do not open until 8 am.
The address is: Mile Marker 115 Route 66Peach Springs, AZ 86434
For check-in, bring your printed receipts and be sure each person has a login to the Havasupai Tribe site. Here you will pick up your wrist bands, parking pass, your tent tag, and other permit info to keep on your person.
Pro Tip: Check in the day before and stay at the cavarans for a good night’s rest and to fully pack up your gear. There is a restaurant close to the hotel, and they offer breakfast with your stay. Keep in mind, the check-in location is still 1 hour from the trailhead parking area.
Hiking into Havasupai Falls
You will need to park at the trailhead here after check-in: https://maps.app.goo.gl/4QRmeo8XqJ59CCfz5
The trailhead area is called Hilltop.
Try to park away from the rock walls to avoid your car having any damage from rock fall.
Pro Tip: Be sure you have enough gas!! It is far from any gas services.
The hike is 10 miles, mostly downhill and flat. After hiking the switchbacks, you are in the canyon hiking through sand + gravel. Then you reach the Supai Village, from there it is steep downhill for two more miles to camp. We started our hike at 6:45 am, and we were at our campsite by 11 am.
Please be respectful of the Supai requests and do not take photos or videos of the Supai Village when you hike through, or the animals or Supai people at any point during your time. Also, remember to stay on the trail when hiking through the Supai village.
Do not hike with headphones in, or you may not hear the approaching horses and mules carrying packs and goods; they do come fast, and you want to be able to move out of the way!
You do not reach a good water resource until camp, unless you plan to buy water in the village.
Pro Tip: Start your hike early!!! While our start and arrival times were perfectly fine, I would start at 4 am if we got the chance to do it again.
Hiking out of Havasupai Falls
The hike out is 10 miles, you guessed it!! Lol.
The biggest difference with the hike out versus in is that you are hiking up all of the elevation gain! The majority of the gain is the first two miles from camp and the last 1.4 miles to Hilltop.
We started at 6:30 am, reaching the switchbacks by noon. If you want to be at the switchbacks before the sun is on them, you need to start at around 2-3 am! We made it back to our truck at Hilltop at 12:45 pm.
Pro Tip: Have cold water and snacks in your car for your arrival back at the top to refuel yourself. We thoroughly enjoyed a cold strawberry lemonade electrolyte drink and some almonds!
Helicopter out of Havasupai Falls
This year, the helicopter was $300 per person and $50 per bag, which must be below 40 pounds. Plan to pay with cash; you can pay by card, but there will be an additional fee.
You can helicopter in and out from the Supai Village (2 miles from camp), but you can not reserve it in advance. The helicopter does give priority to the people of the village. The helicopter lands back at the parking lot on Hilltop.
The helicopter typically flies on Sunday, Monday, Thursday, and Friday. However, you should always be prepared to do the hike yourself as a flight is not guaranteed.
Flights start at 9 am, but you want to get to the helipad earlier than that to get in line for a ride.
It is also possible to fly into Supai Village from Hilltop via helicopter, again something you should not depend on in the event that the helicopter is not flying or there is no availability.
Pack Mules
If you do not wish to carry your own pack, you can choose to have a pack mule carry your bag for you. This is apart of the reservation system so you need to book it when you get your permit.
The cost is $400 round trip for up to 4 bags that are soft-sided and weigh less than 32 pounds.
The mules collect your bags at Hilltop and drop them off at the entrance of the campground by the Ranger station. When hiking out your bags are to be collected by 7 am at the same spot for the mules to carry back up.
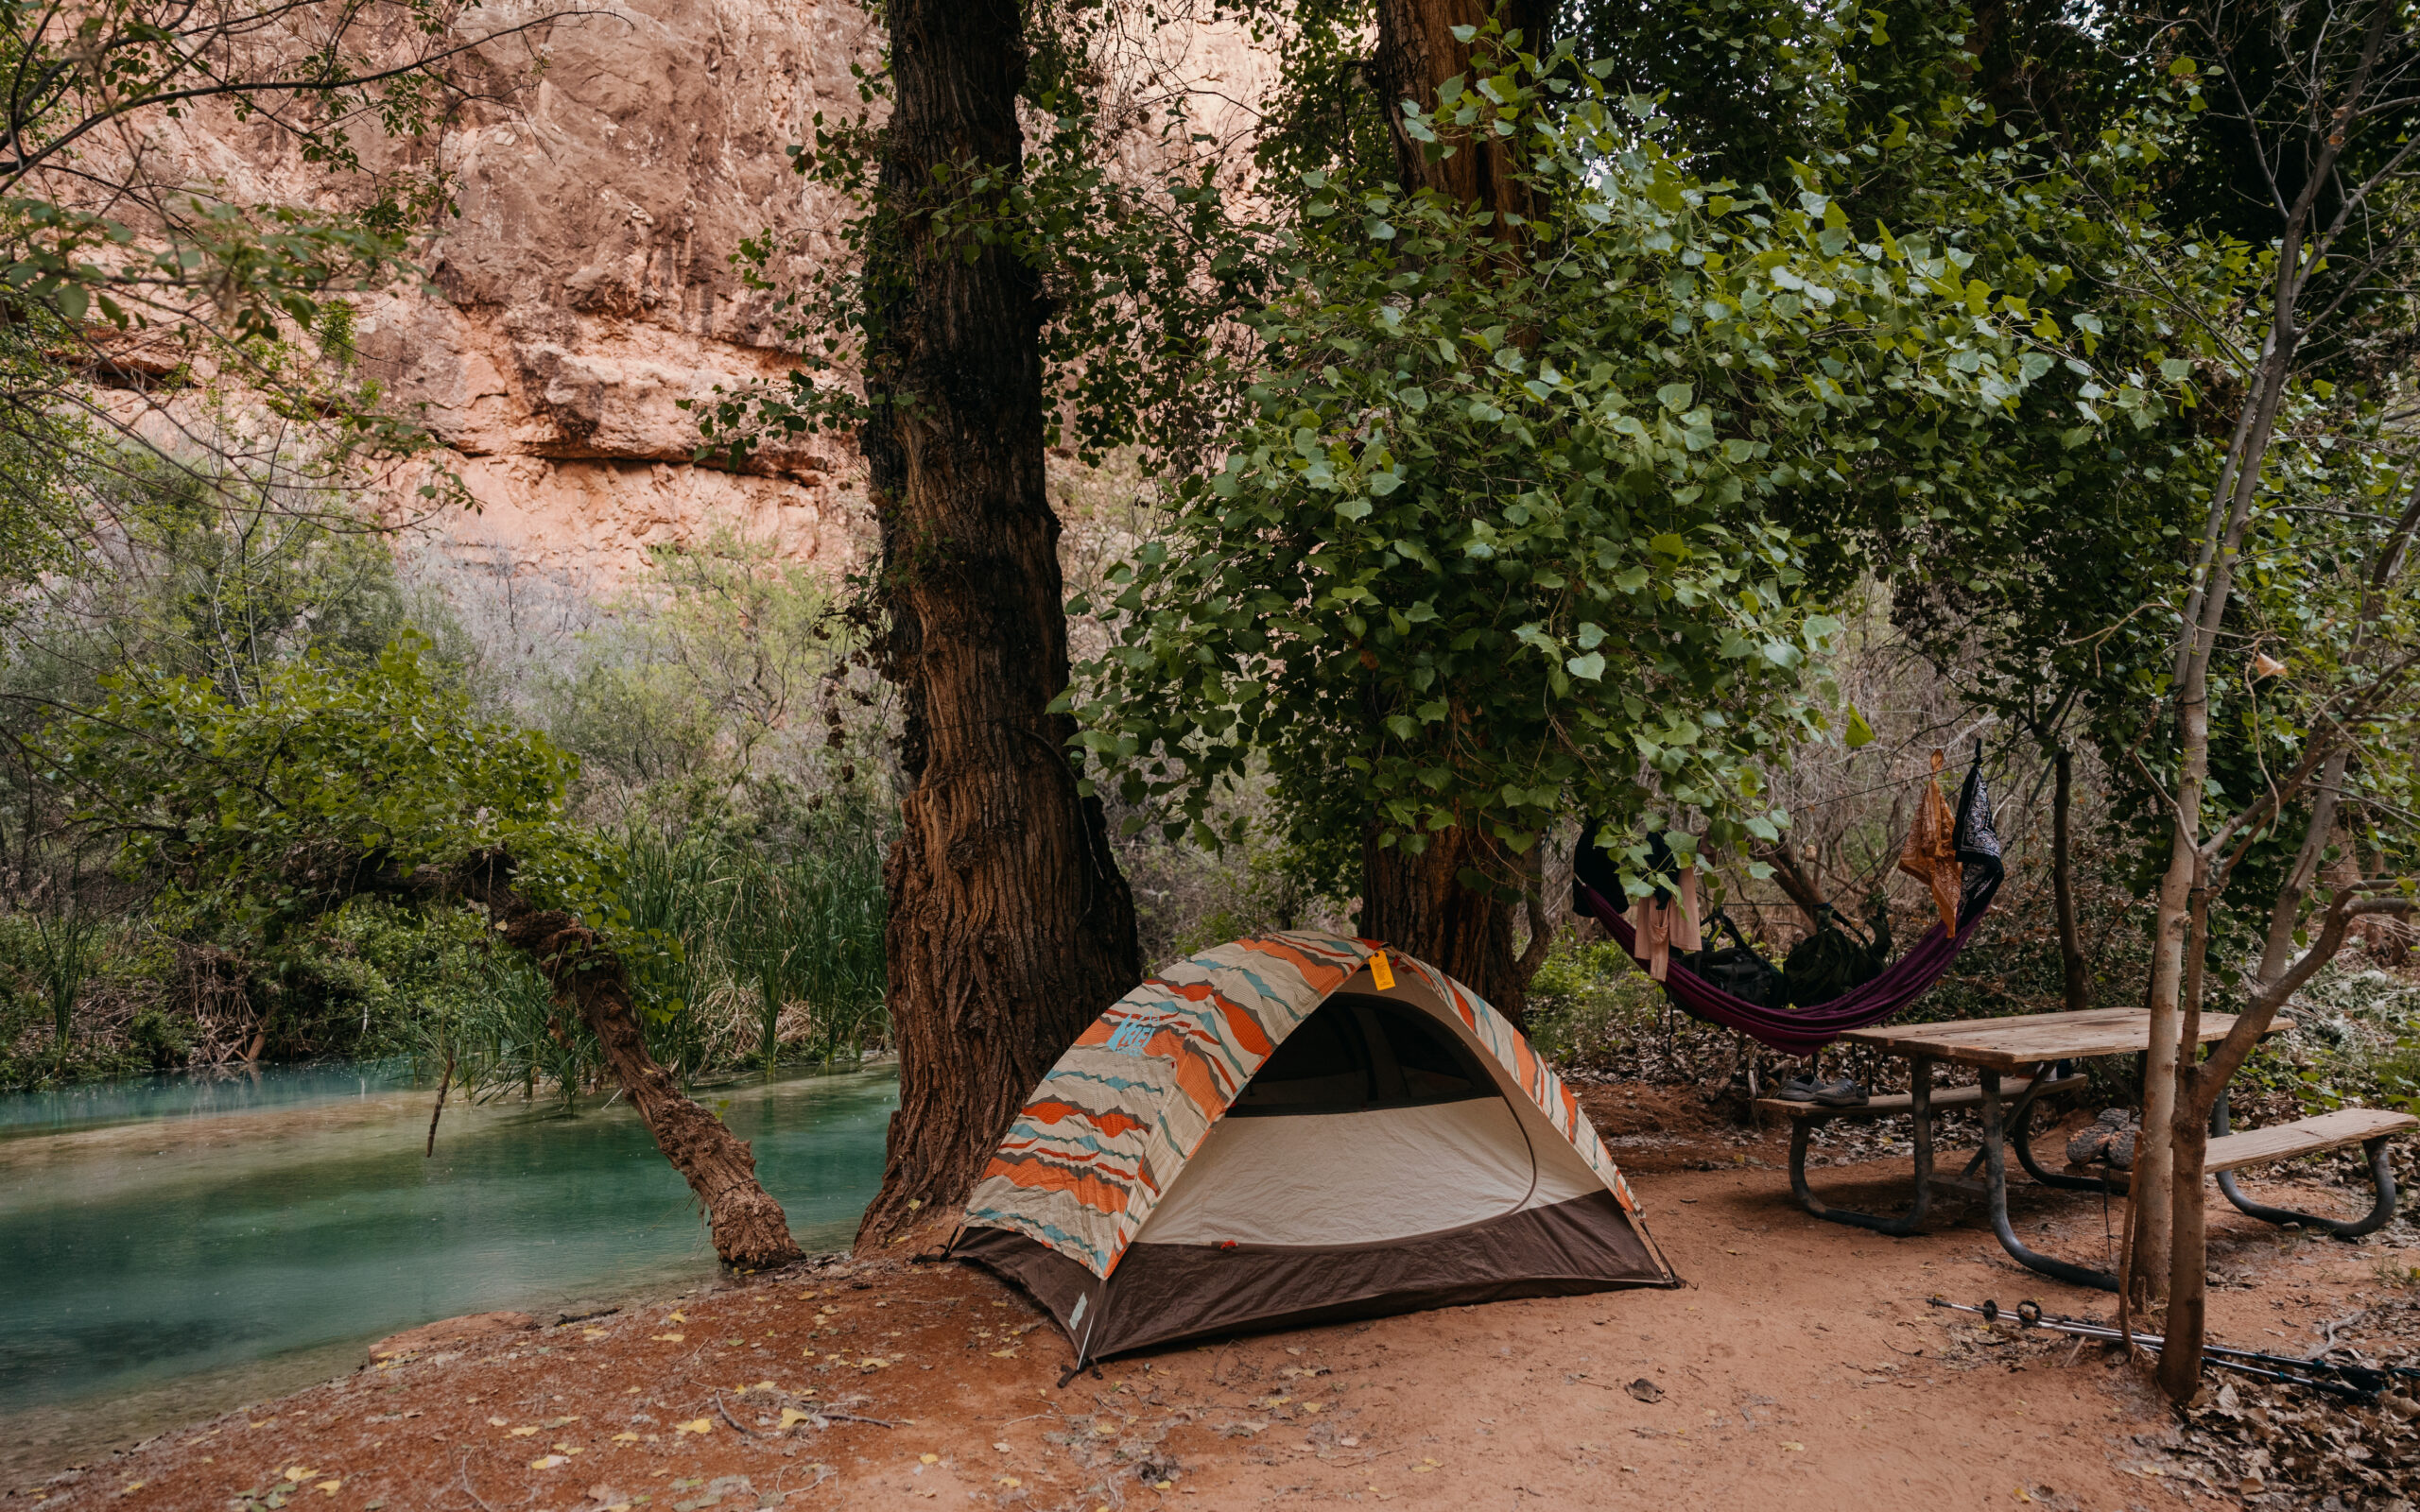
Havasu Falls CampIng
Campsite locations are first come first serve upon your arrival. Each campsite is “marked” by having a picnic table.
When you arrive at the campground, there are camping options that start right after entering the campground by the 1st bathroom + ranger station – these are closest to Havasu Falls. The campsite options end almost just above the descent to Mooney Falls, by the third bathroom.
We chose to camp on the “island” by the second bathroom. We felt that this was a happy medium ground to be .3 miles from the fresh drinking water – Fern Springs, but very close to a bathroom and in between the two main falls.
The bathrooms are quite clean and lovely to use!!
Campground’s quiet hours are from 8 pm to 5 am – remember that the tribe does request that you do not hike at night!
While you do not have to worry about bears, you do need to protect your food from the reservation dogs + mice. We recommend a bear can or hanging an Ursack in the trees. However, the mice are clever, and we have seen them get into several ursacks!
Remember to pack out all of your camp trash!!!
Personal opinion: Camp over staying in the Lodge! The Lodge is in the Supai Village, which means you have to walk one of the steeper sections of the trail each day that you want to go see the falls. The Lodge may be great if you only want to visit Havasupai Falls and want to try the Fry Bread stand, but we found it more valuable to be in the campground.


Havasu Falls
This is the first waterfall you see and quite the greeting into the campground! This fall is perfect for swimming, over Mooney Falls.
We did go in March, but personally I found the water quite cold to swim in once the sun was no longer on the water.
You can download on your phone an app called SunSeeker to be able to check the hours of sunlight you will have on the falls. I also personally really enjoyed photographing the falls while there was sunlight on them as well.


Mooney Falls
This waterfall felt like the star of the show, but also it is not easy to get to!
Just a short walk from camp, you get the overview of the waterfall, go through two tunnels, and reach the chain area. The rock here is as slick as glass and is wet from the spray of the falls. TAKE YOUR TIME. It took us about 20 minutes to get down each time and about 10-15 to get up.
Several folks recommend having gloves for this section; we personally did it without gloves as we felt we had more control and function of our hands on the chains without them.
Important tip: Go down the ladder + scramble section facing the wall, not facing the falls. You have more control of your body this way, and it is the safest way to tackle it!!
While this waterfall doesn’t seem very ideal for swimming, I still preferred photographing this fall with sunlight behind it, which during our trip was from 9:40 am to about 1 pm.


Beaver Falls
This waterfall is the best for swimming and hanging out in the water, but it takes the most effort to get to. Beaver Falls is a two mile hike from Mooney Falls.
On the hike, you will cross three river crossings and make your way up and back down three ladders. The hike is mostly flat through grass and the stunning canyon until the last half mile where it gets more scrambley.
This section was honestly one of my favorite parts of being down in the canyon, it was just so beautiful, like a desert Amazon with different colors of the blue-green water!
Keep your eyes open for snakes throughout this section!


Hiking to the Confluence
A confluence is where two bodies of water meet, in this case, the Supai River and the Colorado River. The Supai River is essentially turquoise, but the Colorado ranges from dark green to brown. It is most obvious on days the Colorado is brown; on the day we went, it was green.
The hike to the confluence is around 12 miles round-trip. On the day that we did the hike, I counted that we did 34,647 steps, which is about 14.5 miles, but we did stop at Beaver Falls and went to Fern Springs post hike.
We started our hike from camp at 6:30 am and returned to camp at 5 pm, pausing for a 1-hour lunch break at the confluence. We really took our time to enjoy the hike, as it is so beautiful!
You are very likely to come across big horn sheep on the trail. Give them space and be patient as they move off the trail.
The trail starts at a fork at Beaver Falls, going up. There is a wooden sign to make the trail, but the words on the sign have faded away. Overall, the trail is easy to follow, and sometimes you will see pink ties on trees to lead the way. However, there were two times we got slightly “lost.”
The first was towards the end of the hike (.2 miles), it appeared to go up a rock walk, but instead you need to go down until you get to a tunnel that then puts you at the water to cross to the other side.
The second time was actually on the way back; we kept hiking, missing the river crossing to the steep scramble section back to the top of Beaver Falls. We built a few cairns in hopes that other hikers won’t miss the turn in the future.
Pro Tip: Don’t just bring a “water shoe,” bring a shoe that is ideal for hiking AND crossing water. This will save you so much time from changing shoes back and forth on the 7 water crossings after Beaver Falls.

Ideal itineraries for Havasu Falls
The perfect 4-day trip will really depend on what you want most out of your trip, your adventure level, and the time of year of your trip. I write timelines for a living as an elopement photographer, so I put a couple of options together below that you could take! However, I am writing these based on our hiking speed and the time of year our trip was – March 23-26. During this time, sunrise was 6:35 am, and sunset was 6:34 pm.
Havasu Falls Itinerary that includes hiking to the Confluence
Day 1:
- 3:30 am – Leave Cavern Inn
- 4:30 am – Park at Hilltop
- 4:45 am – Start hike
- 9am – Arrive to Camp + set up
- 11:15 am – Visit Havasu Falls + have lunch by the water
- 3:45 pm – Back at camp for the night to relax, read, have dinner and prepare bags fro the next day
Day 2:
- 5:30 am – Wake up to have breakfast + refill water
- 6:30 am – Start hike to Confluence
- 11:45 am – Arrive at the Confluence, sit and have lunch in the shade
- 12:45 pm – Start hike back
- 5 pm – Arrive back at camp to refill water, relax, read, and make dinner
Day 3:
- 7 am – Wake up for breakfast + refill water
- 8:30 am – Leave camp to go to Mooney Falls
- 10:00 am – Keep hiking to Beaver Falls
- 11:30 am – Arrive at Beaver Falls, have lunch + swim
- 1:15 pm – Start hike back Camp, stopping along the way to enjoy sights
- 3 pm – Arrive back. to camp to relax, fill water, have dinner, and pack up camp for things not needed that night (Or you could visit Havasu falls again before getting water + going back to camp)
Day 4:
- 4:00. am- Wake up to have breakfast and break camp
- 5:15 am – Leave camp, stop to fill water
- 10:45 am – Arrive back up at Hilltop

Havasu Falls Itinerary without going to the confluence
Day 1:
- 6:30 am – Leave Cavern Inn
- 7:30 am – Park at Hilltop
- 7:45 am – Start hike
- 12 pm – Arrive at camp, set up, have lunch, refill water, and prepare for the next day. From there, relax in the hammock and enjoy!
Day 2:
- 6:30 am – Wake up to have breakfast + refill water
- 7:45 am – Hike to Havasupai Falls from fern spring
- 8:10 am – Arrive at Havasu Falls to swim + take photos
- 11 am – Hike to the Fry Bread stand for lunch
- 12:30 pm – Explore the area around 50 foot falls and Navajo Falls
- 3 pm – Arrive back at camp to rest in the hammock, have dinner and prepare for next day
Day 3:
- 6 am – Wake up for breakfast + refill water
- 7:30 am – Leave camp to hike to Beaver Falls
- 10:00 am – Arrive at Beaver Falls to swim + have lunch
- 12:45 pm – Start hike back
- 2 pm – Arrive at Mooney Falls to explore and photograph the area
- 4 pm – Go up the chains + hike to fern springs to refill water
- 4:45 pm – Arrive back. to camp to rest, have dinner + pack up
Day 4:
- 5:00. am- Wake up to have breakfast and break camp
- 6:30 am – Leave camp, stop to fill water
- 12:00 pm – Arrive back up at Hilltop

Havasupai Falls Packing List
Below is our full packing list for the trip. If anything has a backlink, it is linked to the exact item we brought with us! Some links do earn commission.
- Hiking packs – I recommend going and getting fitted for the right pack for you at REI. Our packs were 70 meters each.
- Small day pack
- Tent
- Hammock – A serious highlight of our trip was lying in the hammock at camp along the river!
- Sleeping Bag
- Sleeping Pad
- Camp Pillow
- Water Bottles + Water Bladders
- Headlamps + Batteries
- Bathing Suit
- Hiking in + out outfit
- Outer layer/jacket
- Hiking boots
- Water shoes that you can hike in
- Camp outfit
- Underwear + hiking socks
- Toothbrush/Toothpaste/Medications/etc
- Meals for 4 nights, 3 days – I prefer Mountain House meals for taste, Bill prefers Peak Two for more calories
- Snacks – consider weight + calories when picking your snacks
- Bear Canister
- Jetboil
- Fuel
- Camp mug
- Camping forks + bowls
- Bandanas for cleaning cooking supplies, but also for dust while hiking
- Hiking poles
- Mole skin for blisters!
- Sunscreen – ideally water proof
- Chapstick
- Sun hat
- Book or game for while at camp, we read Braiding Sweetgrass while at camp
- Garbage bag – we used gallon size plastic baggies
- Dry Bags
- Wag bag
- Camera to document the memories! Personally, we brought one camera body + our 24-70mm lens.
- Cash

FAQ for Visiting Havasupai
Can I bring alcohol to Havasupai Falls?
No, alcohol is not permitted along with any illegal drugs.
Can I stay longer than 4 days and 3 nights at Havasupai?
No it is a fixed time for each permit.
Will there be cell service at Havasupai?
No, there is no cell service. That includes. the parking lot, the hikes, and the campground. We heard that AT+T gets a bar or two in the Supai Village, but we did not test this theory. It is important to download Google Maps of the driving area before heading out. We also recommend downloading Gaia and saving the trail information for the region. Even though trail maps won’t work in the canyon, they can be helpful in seeing the maps.
Are there bathrooms at Havasu Falls?
Yes, there is a bathroom at the Hilltop parking lot area. The next bathroom is at the campground entrance, and the last one is right before descending to Mooney Falls.
If you are not near a restroom when you need to go, remember to pee at least 200 ft from a water source. If you need to go number two, pack it out in a WAG bag.
When is the best time to go to Havasupai?
Personally, I was really really happy with the time frame that we went – March 23-26. The weather was ideal, and there weren’t a lot of people there! I think either way, hiking in on a Monday may help with visiting during a less crowded time.
I would avoid going during the monsoon season, which is June 15 to September 30th. I would also avoid going during Spring and Fall break times for schools to avoid crowds.
I think it would be so stunning to go when the Cottonwood Trees are in peak foliage, which would be mid-October to early November.
Keep in mind, you can not go during the months of December and January as the campground is closed.
What to do in a Havasu Flash Flood?
Be sure to check weather before your trip into Havasupai to check nearby rain and flash flood warnings. Do not go if it seems unsafe.
If there is a flood, look for brown water! This is one of the first signs of flooding! You need to move to higher ground as quickly as possible. There is a higher ground area you pass with a sign on your way to camp, make note of it as you hike in!
How to prepare for your trip to Havasupai?
I recommend joining the Havasupai Facebook group to be able to ask questions and hear about recent trip reports. We found this to be key in getting helpful information!
Pack early so that you know if you need to pick up any last-minute items and make sure you have the right pack for the trip.
From a fitness perspective, just get out and hike! In the gym, you could work on cardio, especially on the stair master.
What airport is closest to Havasupai?
The closest airport is the Flagstaff airport, but this being a small airport, most people do not fly into here.
The Vegas airport is 3 hours and 45 minutes from the trailhead parking lot and what most people fly into.
The Phoenix airport is 4 hours and 20 minutes from the trailhead parking lot, 4 hours and 45 minutes if you want to drive past Sedona, Arizona.
Can you elope at Havasu Falls?
From the best that we can tell, no, you can not elope at Havasu Falls. Personally, we are really firm believers in respecting rules on native land. So while you can not get married here, it is a great trip for your proposal or honeymoon!
Top places we recommend to elope at nearby Havasual Falls:
In general, if you are looking for a place that feels this epic to elope at, we recommend checking out our Best Places to Elope guide!


Meet your team!
Hi – it is Traci, Bill and Malachi
Over the years, we’ve helped hundreds of couples plan and document intentional, meaningful elopements in wild places.
Our blogs are where we share what we’ve learned—location guides, planning tips, real elopement stories, and advice to help you feel confident and inspired as you plan your own day.
Whether you’re just getting started or deep in the details, we’re here to support and inspire you. When you’re ready, reach out to book a free consult call and start planning your day with us.